
Table of Contents
- Why 1970s Homes Are a High-Risk Decade for Asbestos
- Where Asbestos Is Found in Homes: Room-by-Room Inspection
- Why You Cannot Identify Asbestos by Sight Alone
- Asbestos Testing for Homes: How Confirmation Actually Works
- What to Do If You Find Asbestos: A Condition-Based Decision Guide
- Asbestos Safety Precautions During Renovations
- How to Verify a Licensed Assessor or Laboratory
- Conclusion
- Frequently Asked Questions
Last Updated: October 19, 2026
Why 1970s Homes Are a High-Risk Decade for Asbestos
A house built in the 1970s sits in the worst possible window for asbestos. Australia’s use of asbestos in building products peaked in the years after World War II and continued well into the 1980s, so a 1970s home is likely to contain multiple asbestos-containing materials rather than one or two.
That matters because the risk is not just presence. It is condition.
Homes from this decade also hide asbestos in places later builders never used it. Think sheet walls, ceiling materials, eaves, and wet-area linings.
Below, we’ll show you exactly how to identify asbestos in 1970s homes safely, room by room, and what to do the moment you suspect it.
Never drill, sand, or pry at a suspect material to “see what’s inside”. Disturbing it can release airborne fibres and turn a manageable problem into a contamination event.
Where Asbestos Is Found in Homes: Room-by-Room Inspection
The safest way to check a 1970s home is a visual inspection only. You do not touch, scrape, drill, or sample. Sampling is a job for a licensed assessor, because a single dry scrape can release fibres you cannot see.
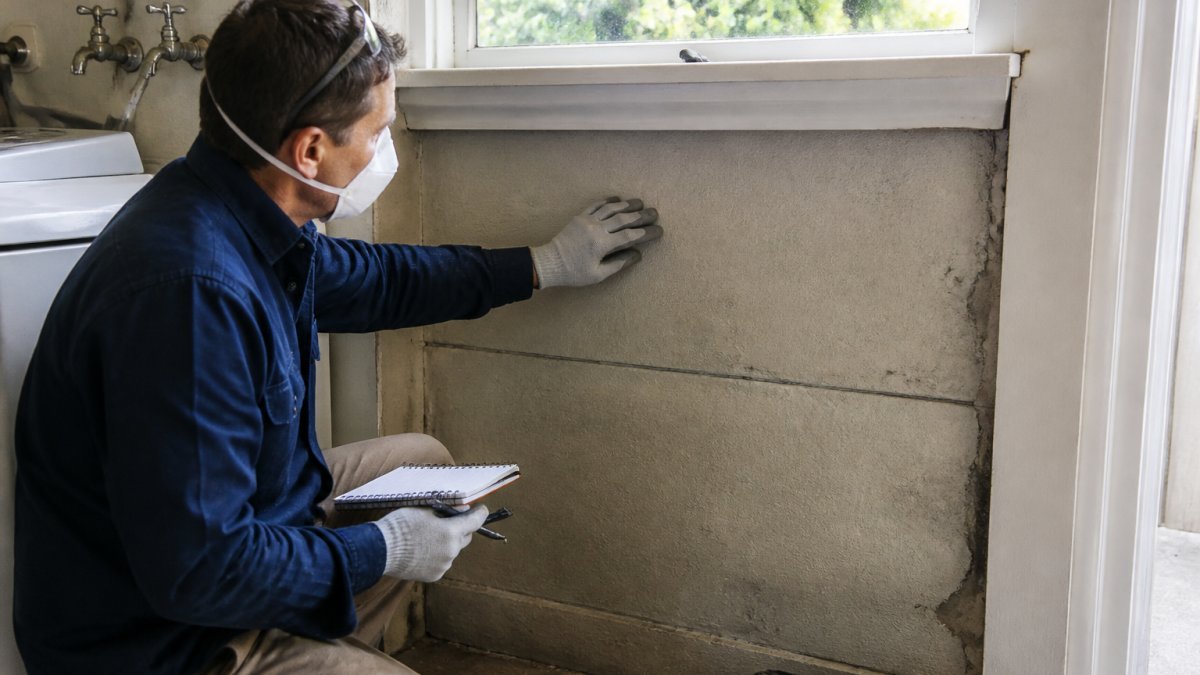
Work through the property in a set order so nothing gets missed. Use a torch, a phone camera, and a notepad. Record the room, the surface, the material’s apparent condition, and the approximate age of the home.
Why the 1970s Decade Matters for Materials
Australia’s use of asbestos in building products peaked in the decades after World War II and continued well into the 1980s. A 1970s home therefore sits in a window where multiple asbestos-containing materials were commonly used together, not just one or two.
Age alone cannot confirm asbestos. A 1970s build date raises the probability, but only laboratory testing confirms what a material actually contains. Treat the decade as a prompt to look harder, not as proof.
Exterior and Structural Materials
Start outside, working from the roofline down. In 1970s homes, common asbestos-containing materials here include:
- Roofing sheets and ridge capping
- Eaves and fascia linings
- External wall cladding, often fibro sheeting
Check for damage, not just presence. Cracked, drilled, weathered, or previously patched sheets are the ones that matter most. Note any sheet that has been cut, drilled for a vent, or repaired, because those edges are where fibres are most likely to have been released.
Interior Surfaces and Wet Areas
Inside, wet areas carry the highest concentration. Look at:
- Sheet walls in bathrooms, laundries, and kitchens
- Ceiling materials, especially in wet rooms
- Vinyl floor tiles and the backing under them
Note the fibre colour and any visible product packaging or stamps. Both help an assessor later.
A Safe Inspection Workflow, Room by Room
A clear sequence keeps you safe and makes the record useful:
- Check records first. Look for building plans, renovation approvals, and any previous asbestos report. Records can narrow down which materials were used and when.
- Walk the exterior. Work from the roofline down, photographing suspect sheets from a distance.
- Walk the interior wet areas. Bathroom, laundry, and kitchen first, then ceilings and floors.
- Check service areas. Hot water pipes, heaters, and any insulation.
- Note condition, not just location. Mark each suspect material as intact, damaged, or disturbed.
- Stop at the surface. Do not lift tiles, peel back vinyl, or open wall cavities to look further.
What to Record for the Assessor
A useful record includes the room, the surface, the material’s apparent condition, whether it has been cut or patched, and the approximate age of the home. Photographs taken from a safe distance are enough. You do not need to get close, and you should not remove a sample to “help” the assessor. The assessor will take any sample safely, using wetting methods and personal protective equipment.
Decision Guidance Based on Condition
What you do after the inspection depends on condition:
- Intact and undamaged in a sealed, low-traffic area: label it, leave it, and monitor it.
- Intact but likely to be disturbed by planned work: engage a licensed assessor before any trade starts.
- Damaged or crumbling: restrict access and call a licensed assessor immediately.
That condition-based sequence is the practical difference between a safe inspection and a dangerous one. Look, photograph, note, and stop at the surface.
Why You Cannot Identify Asbestos by Sight Alone
You cannot identify asbestos by sight, and no guide should tell you otherwise. Asbestos fibres are microscopic.
Fibro sheeting, for example, looks like ordinary grey cement board. So does modern fibre cement.
The difference is invisible. Only laboratory testing confirms it.
This is the part most DIY guides get wrong. They show photos and invite you to “match the pattern”.
Treat every suspect material as asbestos until a lab says otherwise. That single rule keeps you safe.
Photograph the material in place, note the room and surface, and record the approximate age of the home. An assessor can often narrow down likely materials from that alone, before any sample is taken.
::: Documenting these structural details provides a clearer picture of the property’s overall condition, which is particularly useful when you also need to inspect for signs of outdated home wiring.
Asbestos Testing for Homes: How Confirmation Actually Works
Asbestos testing for homes works through sample collection by a trained person, followed by analysis at an accredited laboratory. You do not collect the sample yourself.
The process runs like this:
- A licensed assessor inspects the property and identifies suspect materials.
- The assessor takes small samples safely, using personal protective equipment and wetting methods to stop fibres spreading.
- Samples go to an accredited laboratory for analysis.
- You receive a written report listing each material and its result.
Testing costs vary with the number of samples and the laboratory. Ask for a quote rather than assuming a figure, and ask what the quote covers: inspection, sampling, analysis, and the written report are not always bundled.
Before, During, and After a Renovation
Renovation is the key trigger for exposure, so the testing timeline matters as much as the test itself.
Before work starts:
- Get the asbestos report before you lodge plans or book a demolition crew.
- Brief every tradesperson on where suspect materials are.
- Confirm which materials will be removed and which will be left in place.
During work:
Get a Free Demolition And Asbestos Removal Quote →
- If a trade uncovers a suspect material not in the report, stop work in that area immediately.
- Do not let anyone cut, sand, or drill the material while it is being assessed.
- Keep the area sealed and restrict access until the assessor has looked at it.
After work:
- Obtain a clearance or written confirmation that the area is safe to reoccupy, where your assessor provides one.
- Keep the report and disposal documentation with your records.
- Do not restart work until the status of every suspect surface is confirmed.
That stop-assess-restart sequence is the part most guides skip, and it is the part that prevents a manageable renovation from becoming a contamination event.
Choosing and Verifying an Assessor or Laboratory
Verification is simple, and skipping it is the most expensive shortcut in the process. Ask for the licence number, then check it against the official register.
Use this checklist:
- Ask for the assessor’s licence number in writing
- Confirm the licence covers the work you need
- Ask which accredited laboratory will analyse samples
A legitimate operator will hand these over without hesitation. One who deflects is one to walk away from.
According to Safe Work Australia’s asbestos guidance, asbestos removal work above certain thresholds must be carried out by a licensed removalist.
What the Report Should Tell You
A useful report lists each material, its location, its condition, and its result. It should be specific enough that a removalist can plan the job from it. If a report only says “asbestos present” without saying where, ask for a clearer one before any work begins.
What to Do If You Find Asbestos: A Condition-Based Decision Guide
What you do next depends on the condition of the material, not just its presence. Intact material in a low-traffic area is a different problem from damaged material in a kitchen.
Use this guide:
| Material condition | Where it is | Recommended action |
|---|---|---|
| Intact, undamaged | Sealed, low-traffic area | Label it, leave it, monitor it |
| Intact but likely to be disturbed | Renovation zone | Engage a licensed assessor before work starts |
| Damaged or crumbling | Anywhere | Restrict access and call a licensed assessor immediately |
| Friable or loose | Insulation, pipe lagging | Treat as high risk; do not enter the area |
For demolition or major renovation, removal by a licensed removalist is usually the practical path. For minor works, an assessor may advise encapsulation or safe management instead.
Asbestos Safety Precautions During Renovations
Asbestos safety precautions during renovations come down to one principle: do not create dust. Every safe practice flows from that.
Before work starts:
- Get the asbestos report before any trade begins
- Brief every tradesperson on where suspect materials are
- Seal off work areas with plastic sheeting and tape
During work:
- Never dry-sweep, sand, or use a standard vacuum on suspect material
- Wet surfaces down if disturbance is unavoidable
- Keep airborne fibres contained with proper sheeting and negative air where needed
After work:
- Bag and label waste for lawful disposal
- Clean the area with wet methods only
- Keep disposal documentation for your records
Mission Demolition handles this end to end on renovation and knockdown projects. Our team is fully licensed and insured, with strict health and safety compliance on every site. Asbestos License No: AD213684.
The report comes first, the tools come second. No trade should lift a hammer in a 1970s home until the asbestos status of each surface is confirmed.
How to Verify a Licensed Assessor or Laboratory
Verification is simple, and skipping it is the most expensive shortcut in the process. Ask for the licence number, then check it against the official register.
Use this checklist:
- Ask for the assessor’s licence number in writing
- Confirm the licence covers the work you need
- Ask which accredited laboratory will analyse samples
- Request a sample report so you know what you’ll receive
A legitimate operator will hand these over without hesitation. One who deflects is one to walk away from.
According to Safe Work Australia’s asbestos guidance, asbestos removal work above certain thresholds must be carried out by a licensed removalist.
Conclusion
The hardest part of asbestos in a 1970s home is not finding it. It is resisting the urge to poke at it yourself.
Mission Demolition removes asbestos and clears sites across residential and commercial projects. Our pricing is competitive and transparent, and we prepare your site cleanly for the next build.
Get a free demolition and asbestos removal quote, and start your renovation with the report in hand.
Frequently Asked Questions
Is asbestos common in 1970s houses?
Yes. Asbestos was widely used in Australian residential construction through the 1970s and was not fully phased out until the late 1980s. A home built in 1979 can still contain asbestos in sheeting, eaves, pipe insulation, vinyl floor tiles and tile backing. The only way to confirm is laboratory testing of a sample collected safely, not a visual inspection alone.
Can you tell whether a material contains asbestos by looking at it?
No. Asbestos fibres are microscopic and cannot be seen with the naked eye. Fibre colour, texture and product packaging give no reliable indication. Materials that look identical can have completely different compositions. If you suspect a material in a 1970s home, treat it as containing asbestos until an accredited laboratory confirms otherwise through proper sample analysis.
What should you do if you suspect asbestos in your home?
Stop work, avoid disturbing the material, and keep people away from the area. Do not drill, sand, cut or break suspect materials. Note the location and condition, then arrange asbestos testing for homes through a licensed assessor or an accredited laboratory. If the material is damaged or you are planning renovations, engage a licensed assessor before any work begins.
Can you renovate a home before checking for asbestos?
You should not. Renovation and demolition disturb materials and release airborne fibres. Asbestos safety precautions during renovations start with a professional inspection and testing before any strip-out. Confirm the age of the home, identify suspect materials, and get clearance from a licensed assessor. Skipping this step risks exposure and can leave you liable for contaminated waste disposal.
Suspect material in your 1970s home is a job for licensed hands, not a weekend project. Mission Demolition brings licensed asbestos removal, full compliance with Australian safety standards, and documented, environmentally responsible disposal to every site. Get a free demolition and asbestos removal quote and move forward with certainty.